The Neighborhood Plumber installs, repairs, and maintains the pipes and fixtures that convey water, waste, and gases. They read blueprints and building codes to determine the best location for plumbing systems, then use specialized tools to make repairs.
Every house and building needs a plumbing system to take in water, drain waste, and regulate indoor climate. Learn how to become a plumber to join this essential trade.
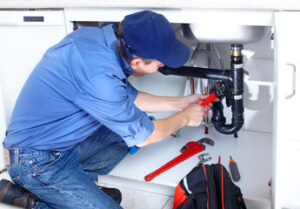
One of the primary duties of plumbers is installing new plumbing systems. This involves laying out piping, setting toilets and faucets, and hooking up appliances like dishwashers and washing machines. It requires knowledge of building codes, blueprints, and safety practices. Plumbers also install septic systems and drainage lines. They may specialize in residential or commercial settings, or both.
In some cases, plumbers may need to repair or replace existing fixtures and appliances. This can include fixing leaky pipes, unclogging drains, or repairing faulty appliances. It’s important for plumbers to have good problem-solving skills, as they often encounter unique challenges that require creative thinking and effective solutions.
Depending on the industry, plumbers may also need to be licensed or certified to work on specific types of equipment or in certain jurisdictions. Licensing requirements vary by state, but typically involve passing an exam and demonstrating your knowledge of the trade.
Those who enjoy working with their hands and have a knack for mechanical tasks may find plumbing to be a rewarding career. It’s a great way to use your technical skills and provide a valuable service to households and businesses. It’s also a great way to make a good income while doing something you enjoy. Many plumbers choose to operate as independent contractors, which gives them more flexibility with their schedule and choice of projects. However, this can also come with additional risks and responsibilities, such as ensuring you have the proper insurance coverage. You should always seek out a licensed, reputable plumber with plenty of experience to ensure the highest quality of work. It’s also a good idea to ask about upfront pricing and any hidden fees or charges.
Repair
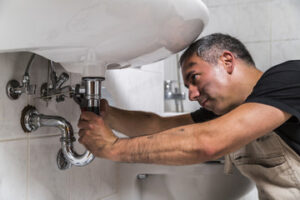
Repairs are a big part of the work plumbers do. They fix issues that occur in homes, businesses, and industrial settings. They can range from simple to complex. For example, they might replace a washer in a faucet or install a new water heater. They can also advise customers on energy-efficient models to reduce their environmental footprint and save money.
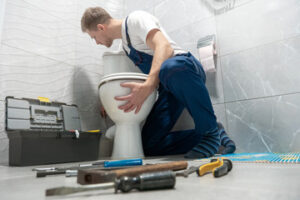
Some common repairs that plumbers do include fixing leaks, unclogging drains and toilets, and replacing worn out or broken parts. They also inspect plumbing systems to identify any potential problems before they become serious and fix them accordingly.
Many of these repairs can be DIY projects for homeowners, but there are some that require the expertise and tools only a plumber has. For example, some clogs are too far into the system to be removed with a snake and may require high-pressure hydro jetting to remove. Using this method, plumbers break up and wash away the clog, then flush the pipe to remove any residue.
Other plumbing repairs that require the expertise of a plumber are installing and repairing water filters, sump pumps, and garbage disposals. They can also advise on and install energy-efficient plumbing fixtures and appliances to reduce household bills.
Regardless of the type of repair, all plumbers must be mindful of health and safety regulations. For example, when working on sewage pipes, they must wear protective clothing to avoid exposure to human waste and bacteria. They also use specific cleaning agents to remove any contaminants from the work area. In addition, plumbers must be aware of the potential risks when working on gas systems. These risks include carbon monoxide poisoning, carbon monoxide inhalation, and a fire hazard.
Maintenance
Plumbing maintenance services are a vital aspect of keeping homes and businesses safe, comfortable, and efficient. Plumbers may install new components like pipes or fixtures, repair or replace existing ones such as faucets or toilets, and perform regular inspections to identify and address any potential issues before they become bigger problems. They also use specialized tools to unclog drains and pipes, and they are responsible for ensuring that water supply and drainage systems comply with local regulations.
A career as a plumber can be rewarding and exciting, but it is also challenging and demanding. Plumbers must have a strong work ethic, excellent manual dexterity, and good physical stamina to succeed in the profession. They often work in cramped spaces and on uneven surfaces, and they must be able to lift heavy objects and maneuver large machinery. Additionally, many plumbers are on-call for emergency services, which can make their schedules unpredictable and require them to work evenings or weekends.
Plumbing professionals also need to be familiar with a wide range of tools and equipment, including hand tools, power tools, and plumbing hardware. They must also be able to read blueprints and understand building codes and construction techniques in order to properly execute their tasks. They may also need to collaborate with other professionals, such as engineers and construction teams, to ensure that plumbing systems are integrated seamlessly into building projects and meet all required standards and regulations. Plumbers must also stay up-to-date on industry trends and new technologies in order to keep up with the latest developments in their field. This ensures that they provide their clients with the highest quality of service and maintain a high level of professionalism.
Inspection
Plumbing inspections are important because they allow a professional to see what is going on inside of a home’s pipes. These professionals are able to pinpoint issues like leaks, clogs, and other problems that could become worse if left unattended. This allows for proactive repairs that can save a homeowner a lot of money and hassle down the road.
In addition to inspecting a home’s plumbing system, plumbers also test water pressure and check for backflow. This is especially important for new construction projects as it ensures that the water supply is safe and that there are no drainage problems. Plumbers are also often called in to perform plumbing inspections before a person buys a home. They can help the buyer determine if there is a septic tank, how old it is, and whether or not it needs to be serviced.
Plumbers can also do plumbing inspections for commercial properties. These inspections typically involve checking the water pressure, locating any leaks or clogs, and ensuring that all appliances are working properly. They can also do more in-depth tests on drain lines, sewer systems, and gas connections to make sure they are functioning correctly.
Some of the more in-depth plumbing inspections that a plumber can do include testing for lead in the water, checking on the size of the pipes to see if they are adequate for the home’s usage, and assessing whether or not the house has a septic tank or is connected to a public sewer. They may also be able to advise property owners on how to maintain their plumbing systems and appliances in order to keep them running properly for as long as possible.
Customer Service
Plumbers need to offer exceptional customer service to build trust and loyalty with clients. Satisfied customers tend to become repeat customers and refer others, which can boost a plumbing business’s reputation and revenue. To meet customer needs, plumbers must provide clear communication, dependable service, and fair pricing. They should also ensure that their staff is well-trained to handle various situations and resolve them quickly and professionally.
Providing excellent customer service requires a high level of skill and knowledge. To meet customer expectations, plumbers should possess a range of soft skills, including effective communication, problem-solving, and teamwork. They should also be familiar with industry best practices and technologies. To enhance their skills, plumbers should participate in continuous training and certification programs.
Plumbing emergencies can occur at any time, so plumbers should be available to respond to calls on a 24/7 basis. Moreover, they should be able to schedule appointments at times that are convenient for the client. They should also keep customers updated on the status of their service and any changes in plans. Additionally, they should offer competitive pricing and up-front estimates to set themselves apart from competitors.
A plumber’s job duties vary depending on the type of project they are working on. However, some common tasks include inspecting and testing pipes for water leaks; repairing broken toilets or faucets; fitting new showers, sinks, or tubs; and removing and installing waste disposal units. In addition, they may need to install gas lines, repair storm drains, and perform routine maintenance on hot water heaters. Moreover, they need to be familiar with the regulations and codes that govern plumbing work in their area. To ensure the quality of their work, they should use high-quality materials and tools and follow industry standards.