Performing regular roof repairs prevents larger problems that can lead to expensive damage and replacement. This can save you money and stress in the long run.
Minor surface repairs like patching holes are relatively inexpensive and easy to perform. You can also replace damaged flashing with sealant.
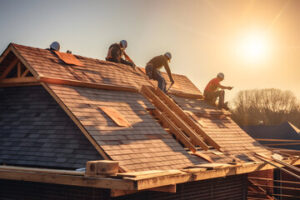
Larger repairs may require professional roofing expertise. Steep roofs are more difficult to work on and cost more, as do roofs with many features that need to be worked around.
A roof leak can do a lot of damage to the structure of your home. It can lead to water stains in the ceiling, mold and mildew, and even rotted wood. A professional should always be hired to inspect and repair a leaking roof. But if you’re a DIY homeowner, there are a few things that you can do to help speed up the process and minimize damage.
First, try to spot the source of the leak. Leaks can often be caused by missing shingles, damaged flashing, or other issues like cracked vents or chimneys. They’re also common near skylights, vents, or areas where the roof meets different planes. Look for shingle debris on the ground or in the attic, shingle ridges that aren’t properly sealed, and wet spots on the ceiling below the leak.
Sometimes it’s easier to find a leak if you can access the attic or crawl space. Shine a flashlight into the attic, and look for wet or dark spots on the sheathing or rafters. If the attic is insulated, you can also check for water stains on the plastic vapor barrier. If you see one, place a bucket or other container underneath it to catch the water.
In some cases, you can pinpoint a leak by using a garden hose to spray water into the attic or crawlspace. If you can hear the water rushing, or you see the water dripping through the ceiling, it’s time to get on a ladder and inspect the problem.
Once you’re on the roof, look for rotten or torn shingles and exposed fasteners. Check the flashing around pipes, dormers, and roof-pitch transition points, too. If a flashing is cracked, torn, or leaking, replace it with a piece of roofing cement and some new flashing.
Be sure to wear proper safety gear (ladders, harness, fall protection) when working on a roof. And remember, if you aren’t comfortable getting on a ladder or don’t have the proper tools for a specific type of roof, it’s best to call a professional. They’ll have the expertise, tools, and experience necessary to safely and effectively repair your roof.
Damaged Shingles
While shingles are designed to resist moisture, they may experience damage from severe storms, aging, or just everyday wear and tear. Damaged shingles can lead to water leaks and other problems. A few cracked shingles can be replaced, but widespread shingle damage could indicate the need for a roof replacement.
The first step in shingle repair is to inspect the damage. A leaking ceiling or a musty smell from the attic are obvious signs of a problem, but even cracking shingles should be addressed promptly to prevent the problem from spreading. Dark spots or streaks on the shingles can signal algae or moss growth. These issues are not just unsightly, but they can cause structural damage to your roof.
To replace a damaged shingle, start by removing any nails that hold it in place. Then, slip a flat pry bar under the shingle directly above and gently lift to expose the nail strip beneath. Use a utility knife to cut around the nails and remove them. Use the same technique to lift the shingle above the damaged one, and then pull up and remove the other shingles to expose the nails. Continue this process until the entire damaged row of shingles is removed.
Next, lay down a new 3-tab shingle. Place it so that it is overlapping the shingles above and nail it down with four roofing nails. After installing the new shingle, apply roofing cement to the edges and any gaps in order to seal them. If you notice that the nails are sticking out from the shingle, you can hide them by applying a small amount of cement over the nails and covering them with a few granules of the old shingle.
If you’re a do-it-yourselfer, a little bit of shingle repair isn’t difficult. You’ll need a hammer, a flat pry bar, a utility knife and a handful of 11/4-in. roofing nails. To begin, slide the pry bar under the shingle immediately above the damaged one and carefully lift to reveal the nail strip underneath. Remove the nails, and then lift and detach the damaged shingle.
Built-Up Roofing (BUR)
Built-up roofing (BUR) is a popular choice for flat and low-sloped commercial roofs. The multiple layers of bitumen and roof felts provide exceptional durability, and a built-up roof can last more than 30 years with regular maintenance.
A BUR system starts with a base sheet that is either nailed or fully adhered to the structural decking. It is then covered with alternating layers of asphalt/tar and roof felts. The installers apply the asphalt in a layering pattern to ensure that the seams are tightly sealed. The top of the roof is finished with aggregate or a mineral cap sheet. These caps are available in a variety of colors and designs to suit the aesthetic preferences of building owners.
The layered design of a BUR roof provides significant redundancy, which helps to prevent leaks and water intrusion. It also makes this type of roof ideal for areas with high rainfall and water ponding. Because a built-up roof has so many layers, it can be a more expensive option than some single-ply roofing systems.
Like all roofs, BUR systems require frequent inspections and maintenance to keep them in good condition. During an inspection, a professional will look for signs of damage, such as cracks, splits and blisters. In addition to repairing these problems, they will also check for moisture infiltration, which is more common in areas with poor ventilation.
A BUR roof can be a great choice for energy efficiency as well. Its insulation sheets help to reduce a building’s energy costs, and the aggregate on the top of the roof provides resistance to thermal shock. In addition, the material is highly fire resistant.
Depending on the type of roofing system, it may be eligible for a guarantee or warranty of up to 20 years. It’s important to consult the manufacturer about the specific requirements and coverage for the guarantee or warranty. Some systems may come with a reflective cap sheet to help reflect the sun’s rays and reduce internal temperatures. This can significantly reduce the amount of energy that is needed to keep a building comfortable.
Flashing
Flashing is a roofing material that protects the edges of your roof and any areas where it meets other features like chimneys, vent pipes, skylights or walls. When properly installed, flashing prevents water from seeping into these areas and causing mold, rot or structural damage to the home. However, flashing can be prone to leaks and other problems, especially as it ages and is exposed to the elements. Regular inspections and timely flashing repair can keep your roof in great shape for years to come.
Flashing can be made from many materials, but the most common is galvanized steel. Galvanized metal is resistant to corrosion and can withstand the elements well. Roofing contractors usually install flashing at vulnerable areas such as roof valleys (where two slopes meet at a downward angle), wall intersections, or any area that will have a roof penetration such as chimneys, plumbing vents and skylights.
There are several different types of flashing, including step flashing that integrates with shingles, counter flashing and a cricket or saddle. These are typically used around chimneys to prevent water from seeping into the joints between a roof and the chimney structure. Flashing can also be made from aluminum, copper or stainless steel. The type of flashing depends on the application and the environment.
While some flashing repairs can be a DIY project, it is important to have any damaged or leaking flashing repaired by a professional. Leaking flashing is a serious problem and can lead to water infiltration, causing mold, rot or other structural problems in the home. It is important to have flashing repaired as soon as possible to avoid costly repairs to the rest of the house.
The most obvious sign that your roof flashing is in need of repair are water stains on the ceiling or interior walls. If you notice these blemishes, it is imperative to contact a local roofing contractor for immediate attention and flashing repair. In addition, any rust or corrosion on the flashing is an indication that it has been damaged by weather and needs to be replaced.