After completing an electrician training program from a trade school or college, apprentices are eligible to start their career in the field. They work for a company or can choose to run their own electrical repair business.
Jacksonville NC Electric collaborates with construction teams to ensure infrastructure compatibility and liaises with HVAC and plumbing professionals to adhere to safety protocols. This career offers many specializations and opportunities for progression.
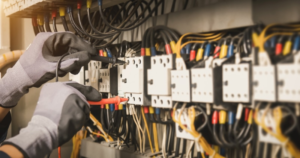
Electricians are responsible for installing, troubleshooting, and repairing electrical systems in residential and commercial settings. They also perform system upgrades to improve safety and efficiency. This job requires a strong knowledge of electrical theory and the ability to read blueprints and technical diagrams. In addition, they must be proficient at using hand and power tools as well as possess good analytical problem-solving skills. They often collaborate with other professionals, including architects and engineers, to ensure that their work is up to code.
Some electricians may choose to specialize in a particular field, such as residential or industrial. Others may run their own electrical contracting business, hiring additional electricians to support them. While this arrangement can offer more control and flexibility, it can also be challenging for newer electricians.
Residential electricians install, repair, and maintain electrical wiring, outlets, switches, and fixtures in homes and apartments. They are also responsible for ensuring compliance with local and state electrical codes and safety regulations. They often have to work in cramped spaces, and it’s important that they take the proper precautions to avoid dangerous situations.
Commercial electricians, on the other hand, are primarily concerned with electrical systems in offices, retail stores, and other commercial buildings. They usually handle larger-scale projects and are experienced working with high-voltage systems, which can be up to 240 volts.
In addition to performing electrical repairs, they also inspect systems and equipment to identify potential problems or hazards. They may also provide guidance and advice to clients on the proper use of their electrical systems. They can also be involved in a variety of other duties, such as planning and designing electrical systems during the construction process.
All electricians must have perfect color vision to correctly decipher wiring schematics and other technical documents. They also need to have good physical strength, as they’re often required to lift and move heavy components and equipment. They must also be comfortable collaborating with other professionals and working independently, as they sometimes spend long periods of time away from their offices. Moreover, they must have excellent communication skills to effectively explain complicated electrical issues to their co-workers and clients.
Education Requirements
In order to become an electrician in the state of New York, you must complete a vocational-technical school program and pass an apprenticeship exam. The training programs last for four or five years, and include classroom and lab-based learning. During this time, you must also acquire on-the-job experience. This can be done through a union-sponsored program or through an independent apprenticeship. You can find a program through the Department of Labor or by searching for a trade school that offers it.
You can also opt to go the college route and complete an associate degree in electrical technology. These programs take two years to complete, and some even offer specialized areas of study, such as green energy and industrial electrical technology. Students who attend these programs often have a leg-up when it comes to finding employment.
Some electricians choose to skip formal education altogether and instead pursue an apprenticeship. This option can be quite rewarding as it allows you to work while getting paid, and is a great way to learn the trade. However, you should note that if you decide to pursue an apprenticeship, you will likely have to join a union and pay dues. In addition to this, you will need to have a high school diploma or GED certificate in order to qualify.
There are many benefits to becoming an electrician, including good salary and job security. However, the industry is competitive and it’s important to make sure you’re well-trained before applying for a position. There are several ways to get the training you need, including online courses and on-the-job experience.
The most important skill an electrician needs is problem-solving. This is because unexpected issues are common on construction sites and need to be dealt with quickly to minimize downtime. Additionally, it’s essential for electricians to adhere to all safety standards and regulations.
Other skills that are useful for electricians include the ability to work independently and use logical problem-solving techniques. They must also have good communication skills and be able to read blueprints and circuit diagrams. In addition, they must have excellent eyesight and physical endurance.
Training Requirements
The first step in becoming an electrician is to enroll in a vocational training program. These programs are offered through trade schools and union apprenticeships, and typically include classroom instruction as well as hands-on practical experience. They usually take a few years to complete and can be a great way to learn the basics of electrical work and how to follow strict safety protocols. The program pairs the apprentice with a master electrician who gives them small tasks to perform in the field. This allows the apprentice to gain real-world experience while earning money and working toward their licensing requirements.
Another option is to pursue an associate degree in electrical engineering or technology from a community college. This degree can help you move into an apprenticeship faster and may provide you with some general education credits that can enhance your employment opportunities. However, this type of degree is not a prerequisite for becoming an electrician.
Once you have completed your vocational school or apprenticeship, you must secure a license to become a full-fledged master electrician. These requirements vary by state but usually involve a minimum number of hours of on-the-job experience and passing an examination. In addition, a Master Electrician must be familiar with and adhere to state and local regulations based on the National Electrical Code.
While on the job, you will also develop critical thinking skills and be able to read blueprints, circuit diagrams, and other technical documents. Other important skills are keen eyesight, good hand-eye coordination, and the ability to think quickly under pressure. You will also need to have good physical endurance as you must frequently climb ladders and lift heavy objects.
Many electricians also choose to specialize in a particular aspect of the field, such as electrical installation or repair for specific types of equipment. This allows them to narrow their focus and become experts in a particular area of the field, which can increase their marketability. Some specializations require additional certifications, such as EPA certification for work that involves hazardous materials. Getting this certification can be difficult because it requires extensive hands-on experience and a lot of classroom learning.
Salary
There are many factors that affect the salary of a licensed electrician. First and foremost, experience is key. Licensed electricians who have worked in the field for over ten years command significantly higher wages than those just getting started. Obtaining additional certifications and delving into more specialized industries is also an excellent way to increase one’s earning potential. In fact, a master electrician with specializations such as solar and renewable energy can see his or her salary double.
Another factor that influences the salary of a licensed electrician is location. As much as the urban-rural divide is about lifestyle, it’s also about the financial currents that run through different regions and cities. Cities and towns that are experiencing growth in their infrastructure development will likely have a greater demand for licensed electricians, resulting in higher salaries.
Lastly, a major influence on the salary of a licensed electrician is his or her work ethic. If an electrician is hardworking and always goes the extra mile to ensure he or she has met or exceeded customer expectations, the boss is sure to notice and reward that effort with higher pay.
Other perks that licensed electricians often receive include health insurance and retirement plans. These benefits serve as a safety net for their families in the event of unexpected medical expenses, and they also provide an opportunity for them to save money for their eventual retirement.
Electricians who operate their own electrical contracting businesses can earn more than those that work for larger companies. This is because those who operate independently can negotiate their own rates, and may be able to charge clients more for services that the company they work for cannot afford to pay them for.
With ServiceTitan’s integrated payroll tools, it is easy to track time and mileage for your electricians, as well as to calculate overtime pay if necessary. This feature is seamless and automated, so you don’t have to worry about transferring timesheet information between your employees and your payroll system or spending hours manually checking and inputting the data. You can even connect ServiceTitan with QuickBooks and Sage Intacct to easily run payroll for your electrical contractors.